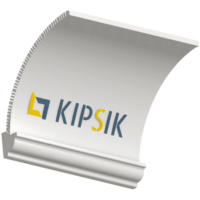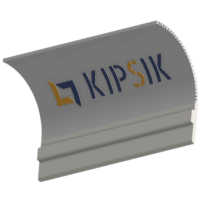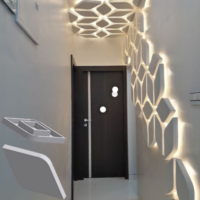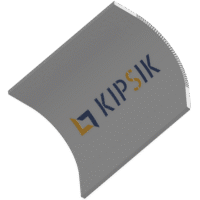
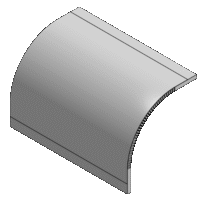
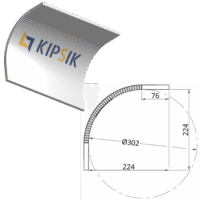
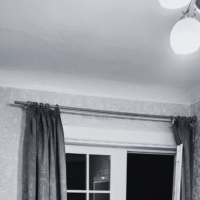
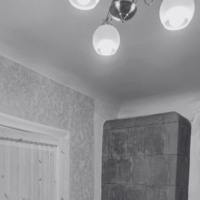
Mirrored arch – ceiling cornice is a curved profile for use at the junction of the ceiling and wall. Diversifies the interior with rounded shapes. Emphasizes the historicity and dignity of the room. It also gives the transition between the wall and the ceiling an artistic look. The dimensions of the product and the material used can be changed according to the customer’s instructions.
Features. The product has similar properties as drywall, except for the places that are machined and glued
Usage. The product is intended for use in rooms with a relative humidity of no more than 70%. The maximum installation temperature is 50°C
Installation
⇒ The corresponding technical solutions have been provided by the construction project developer for installation on construction sites
⇒ It is recommended to install the product on a stone, frame, wood or plaster surface using a wooden or metal frame. If the shape of the product and the profile of the nearby surface allow it, the product can be properly attached to it
⇒ To connect the products together, it is recommended to use either wooden material or a metal frame, which connects both halves of the product together in such a way that cracks do not form at the joints after finishing
⇒ To continue the products (to bind at the junctions), you can also use adhesive foam or gypsum putty loaves that hold the cornice to the mounting surface. It is recommended to fix the cornice surfaces with screws (not strongly) while the loaves dry, which are later removed
Fixing. In thinner areas of the product (e.g. glued surfaces and gaps caused by sawing and milling), it is recommended to use adhesive foam or adhesive sealant instead of screw connections. The requirements for screwing the product are described in the plasterboard installation instructions.
Cutting. It is easy to cut plasterboard to size
⇒ Cut the paper surface in a straight line on one side with a construction knife
⇒ Break the plasterboard along the long cutting line
⇒ Cut the paper surface on the other side
⇒ When cutting the entire product, mark the cutting line (straight or cutting angle) with a laser
⇒ Saw the product to size with a hand saw or miter saw. Sawing must be done carefully – a dull saw, large saw teeth and placing the product on a base can cause the product to break in an unwanted place.
Finishing. Similar to finishing drywall
Filling joints. Similar to filling drywall joints, if necessary, chamfers can be cut into the edges of the product to accommodate a sufficient amount of sealant or joint filler
Storage. Products should be stored on a smooth surface, preferably on a pallet. Protect products from moisture
Transportation on the construction site
⇒ The product must be carried correctly supported and carefully – high tensile pressure can cause the glued surface to come loose.
⇒ If there is a risk that the product will be damaged during transport, additional covers or additional fastenings must be used
⇒ It is recommended to transport long or heavy parts with two people and with two hands
⇒ The internal support blocks and fastening tape of the parts are removed (if necessary) immediately before installation
Mirrored arch – ceiling cornice, manufacturing information
⇒ Gypsum board according to the customer’s wishes, the specified external (v) and internal dimensions (s) are used
⇒ PUR glue D4, 1-component, adheres well to the cut plaster edge, the customer can opt out of gluing
⇒ Painting fabric or construction paper, which is glued to the back (sawed through) surface of the product, restoring its original strength
⇒ CNC-cut ribs to maintain the shape of the arch during gluing and transportation
⇒ Tape to fix the shape of the product during gluing and transport
| Weight | 6.2 kg |
|---|---|
| Dimensions | 2400 × 224 × 224 mm |
| Plasterboard | standard plaster (8.1 kg/m2) |
| Finish | paint, primer, sanding |
| Sound | 5 dB |
| Materials | glass wool, PUR glue |
| Author | Kipsik |
| Manufacturer | Kipsik OÜ |
| Origin | Estonia |